Are you looking to export your WooCommerce orders to Google Sheets?
Google Sheets is a popular online spreadsheet tool among store owners to collect, store, and share order data.
Exporting your WooCommerce orders to Google Sheets can be helpful for reasons such as data analysis, sales order management, bookkeeping, and reporting.
In this step-by-step tutorial, we'll share two easy ways to export WooCommerce orders to Google Sheets. The first method will cover how to do it manually, while the second will show you how to do it in real time.
Let's get started!
What Are the Benefits of Exporting WooCommerce Orders to Google Sheets
For WooCommerce store owners, exporting order data to Google Sheets can provide several benefits. These include:
- Real-time collaboration: As a cloud-based spreadsheet tool, Google Sheets allows you to collaborate with third-party services and give them access to order information in real time. This approach ensures everyone is working on the same version with up-to-date information.
- Data analysis and custom reports: Google Sheets allows you to perform data analysis using various functions, charts, add-ons, and scripts to transform raw data into clear, actionable insights.
- Data backup: Google Sheets automatically saves your data on the cloud, providing an extra layer of security and peace of mind. Your order records are safely backed up, protecting you from potential data loss on your WooCommerce site.
- Integration with other tools: Google Sheets opens the door to integrating your order data with other business apps such as CRM, bookkeeping, and inventory management software. It also has built-in integration with Google Workspace apps such as Forms, Docs, Analytics, and others.
Now that we know the many benefits of exporting order data to Google Sheets, let's take a look at the two available methods.
Two Ways To Export WooCommerce Orders to Google Sheets
We'll be showing you two ways to export WooCommerce orders to Google Sheets, and both methods involve using the WP All Export plugin.
It is a powerful WooCommerce order export plugin that stands out as the best. The plugin features a wizard that simplifies the entire export process into four easy steps. You also get an intuitive drag-and-drop field selector to choose exactly what order fields to add to your export file.

Apart from Google Sheets, it also supports exporting the order data in other formats, including CSV, Excel (.xls and .xlsx), and XML.
It also comes packed with other features, such as:
- Flexible data filters to choose exactly what data to send to Google Sheets.
- Full support for WooCommerce order details, including variations and custom fields.
- In-built data customization features to save you from manual editing later on.
- Real-time exports.
To get started, you'll need to install the premium version of the WP All Export plugin. Once you've installed the plugin, it only takes a couple of minutes to export orders to Google Sheets.
Let's explore both methods one by one.
Method 1: Manually Export WooCommerce Orders to Google Sheets
This method will provide you with a WooCommerce order data file, which you'll then need to add to a Google Sheet manually. This method works okay if you only want to export the data once or on a set schedule.
Let's go over the steps in detail.
1. Create a New WooCommerce Order Export and Filter the Data
Start by navigating to All Export › New Export and choose WooCommerce Orders as the Post Type.

WP All Export will scan your database to show you the total number of orders available for export.
If you want to export only part of your entire order history, WP All Export lets you filter the data so that only required orders are shown in the exported file. For example, you can filter the order status Completed, so that only completed orders are shown in Google Sheets
To set up your filters, simply expand the Add Filtering Options section and start adding custom filter rules.
For each rule, you need to define three components namely Element, Rule, and Value.
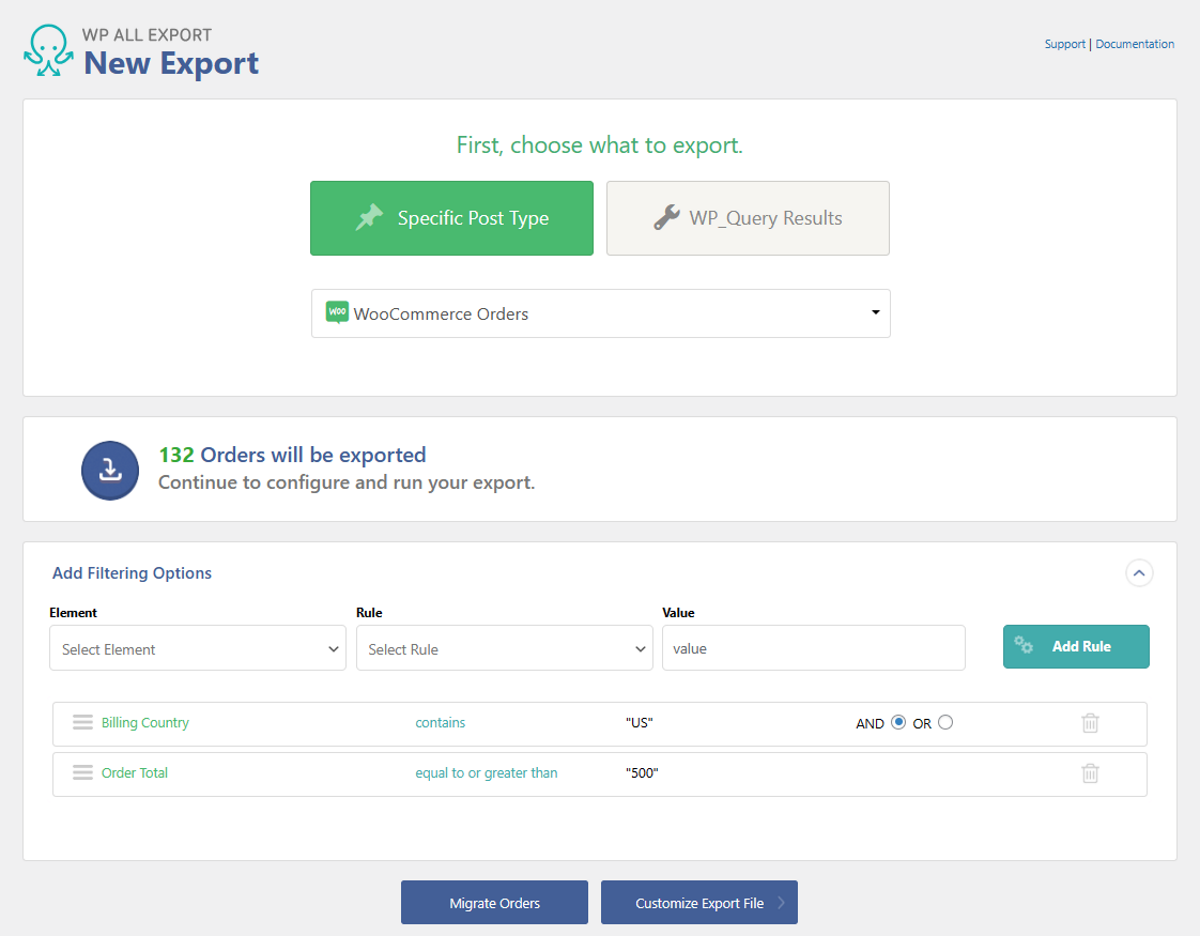
You can also add multiple filter rules and combine them using AND or OR logic. This gives you granular control in specifying exactly which orders to include in your export.
Once you've filtered the orders, click Customize Export File at the bottom to move to the next step.
2. Select Your Order Export Columns
This step lets you choose the desired order data columns to include in the export file. WP All Export comes with an intuitive drag and drop field selector that makes it easy to choose the order data fields.
On the right side, you'll find the Available Data section, which lists various fields categorized into different tabs.
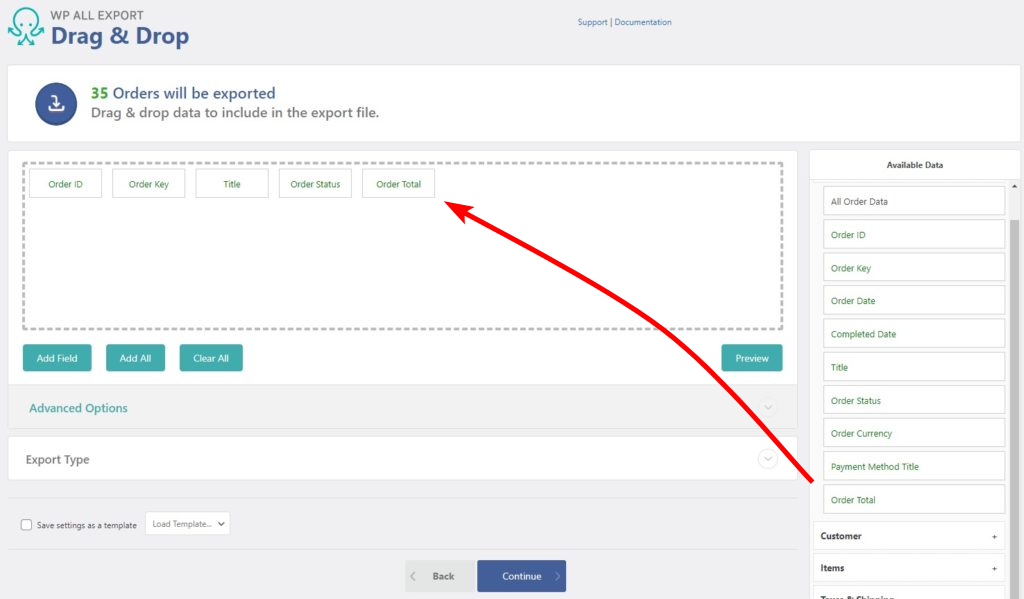
You can expand the tabs to see the available fields and then drag and drop them to the Selection area.
By default, you'll see a few fields added to the selection area. To remove them, simply drag them out of the selection area. You can also rearrange the fields using the same drag and drop interface.
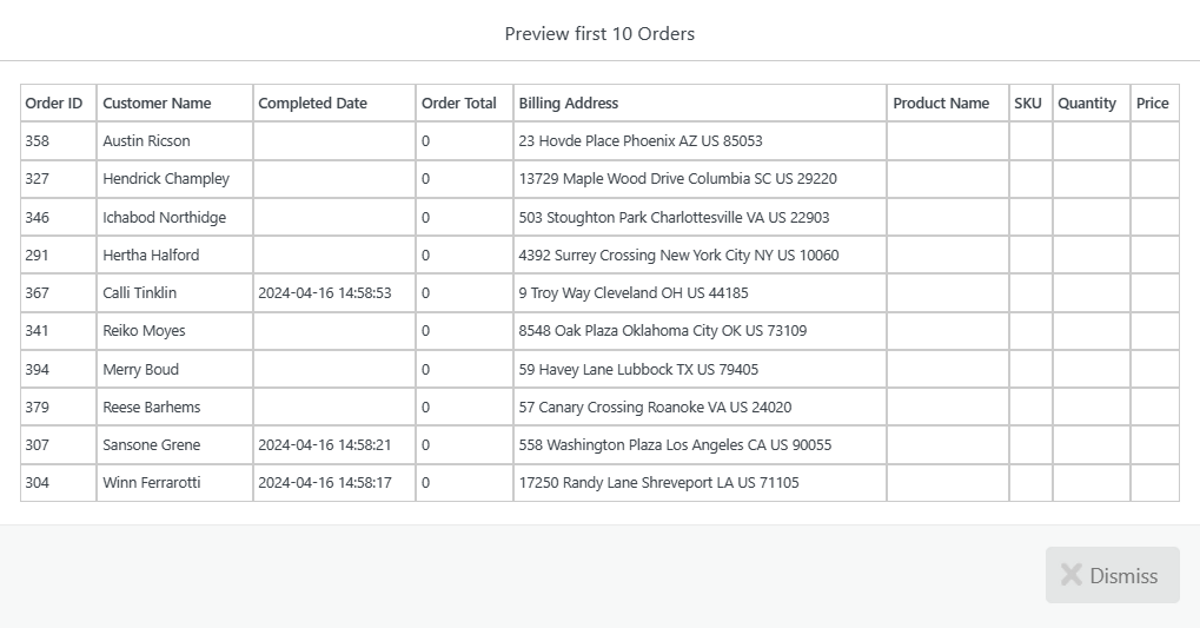
Once you have added all the fields, click the Preview button to see how order entries will look in a spreadsheet.
If everything looks okay, click Continue to move to the next step.
3. Configure Export Settings and Run the Export
The Export Settings screen displays advanced options as simple checkboxes.

Most of the options are self-explanatory and they include:
- Run order exports in real-time as they are completed.
- If you re-run the export in the future, only export orders that have been newly created or modified since the previous export.
- Include BOM to help Excel properly read your export file.
- Create a new export file each time you run the export instead of overwriting the existing file.
- If you have a large number of records, split the export file into multiple files.
- Role permission to allow non-admin roles to export the file.
You can refer to the dedicated article on export settings to learn more about each setting.
On the same screen, WP All Export also offers scheduling options that you can use to create recurring exports. To learn more, refer to our article on automatic scheduling.
Finally, add a custom file name at the bottom and click the Save & Run Export button to move to the next step.
4. Download the Orders and Upload to Google Sheets
Once you've configured the desired settings, WP All Export will run the exporter and notify you when the file is ready for download.
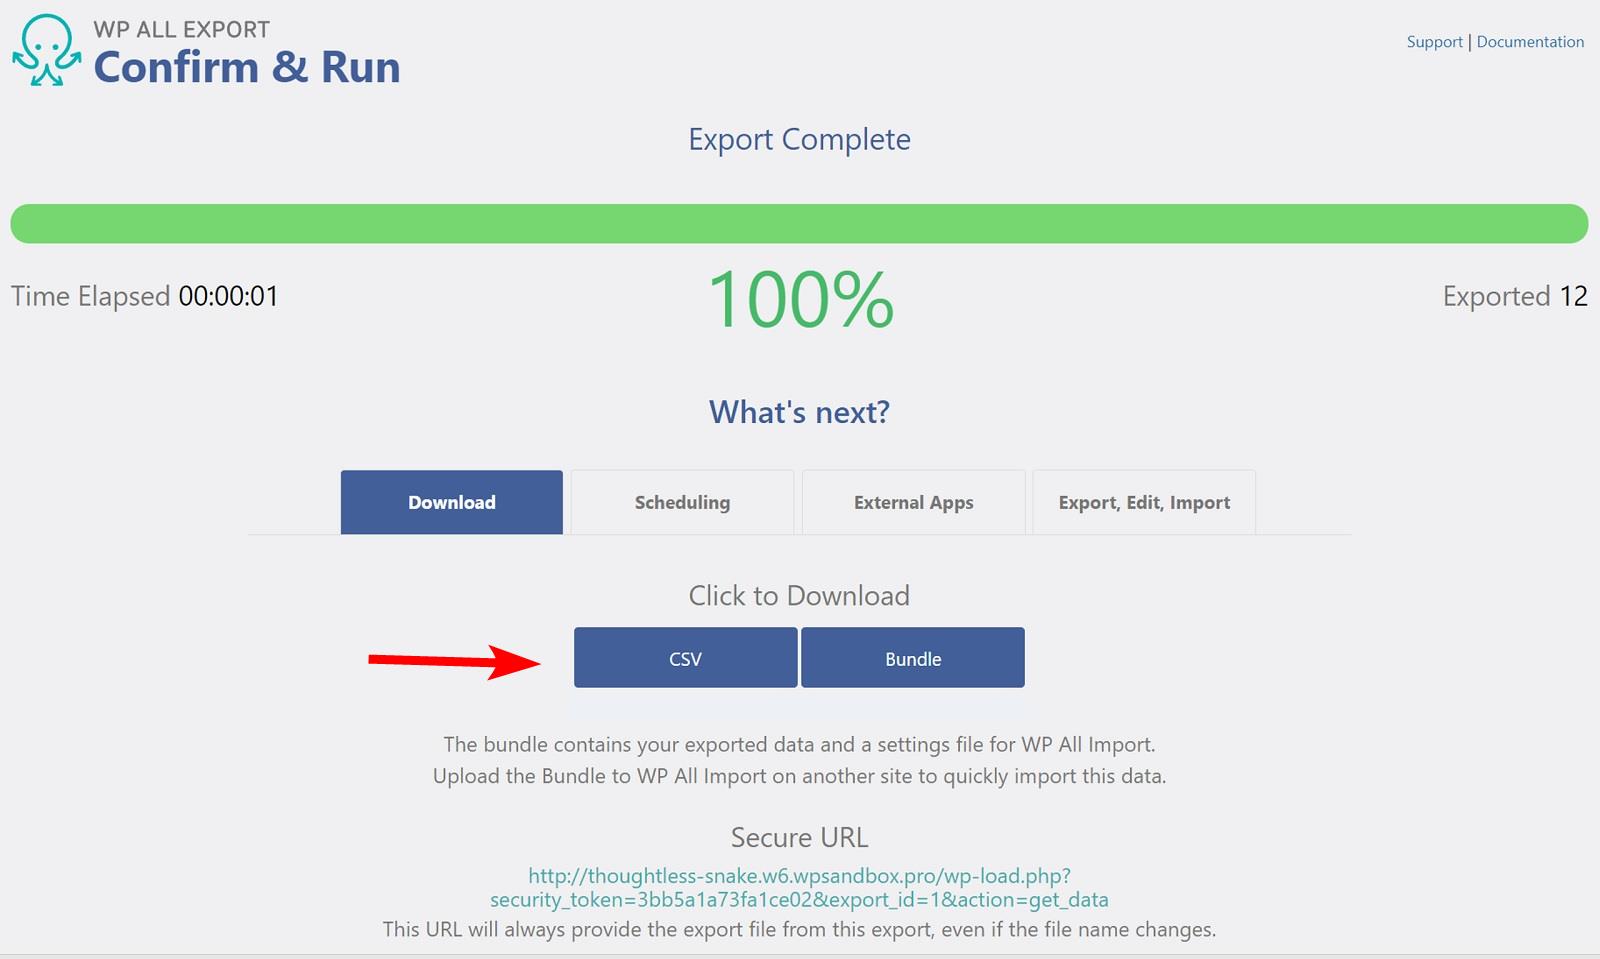
By default, the order export file is in CSV format and you can upload it to show the data in Google Sheets.
Here are the steps to follow to upload exported CSV into Google Sheets:
- Open the Google Sheets and create a new blank spreadsheet.
- Position your cursor in the A1 cell and click File › Import › Upload and select the CSV file that you just exported from WP All Export.
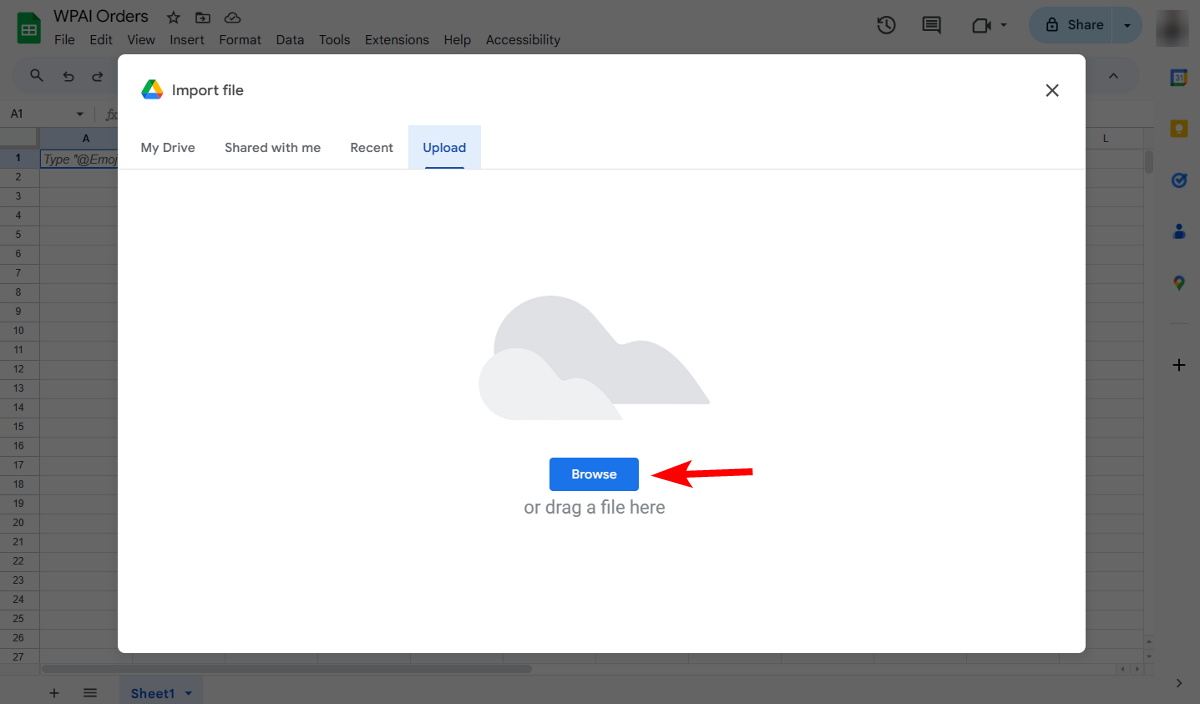
- When the file finishes uploading, Google will present you with an Import File window. In the popup, select Replace current sheet to add data to the same spreadsheet. Keep the separator type to Detect automatically and tick the option for Convert text to numbers, dates, and formulas.
- Lastly, click the Import Data button to show the order data in the Google spreadsheet.
That's it! You've successfully completed your WooCommerce order export to Google Sheets. You can format, filter, and analyze the data as needed for your business requirements.
Limitations of Manually Exporting WooCommerce Orders
While the manual export method is useful for one-off exports, it comes with several limitations. These include:
- Manually exporting orders and updating the Google Sheets file can be a tedious and time-consuming task, especially if you have a high volume of orders.
- Manually importing data from the export file to Google Sheets increases the risk of human errors, such as missing information.
- With manual exports, the data in Google Sheets will only be as current as the last time the export was run, which may not always reflect the latest orders.
- It can be difficult to scale this manual process as your business grows and order volume increases.
To overcome these limitations, WP All Exports provides automated real-time exports that give you more flexibility and save you a significant amount of time and effort. Let's explore how to set up real-time WooCommerce order exports to Google Sheets.
Method 2: How To Export WooCommerce Orders to Google Sheets in Real-Time
WP All Export lets you set up real-time export wherein every time a new order is placed, the export runs and sends the newly added data to external tools such as Google Sheets. This is made possible using the Zapier integration, which lets you connect to 5000+ apps. If you're a developer, you can also create a custom solution using the WP All Export API.
For this tutorial, we'll show how to do it using Zapier.
1. Enable Real-Time Exporting of WooCommerce Orders
Real-time exports can be enabled in the export wizard or you can easily switch an existing or previous WooCommerce order export to real-time exporting.
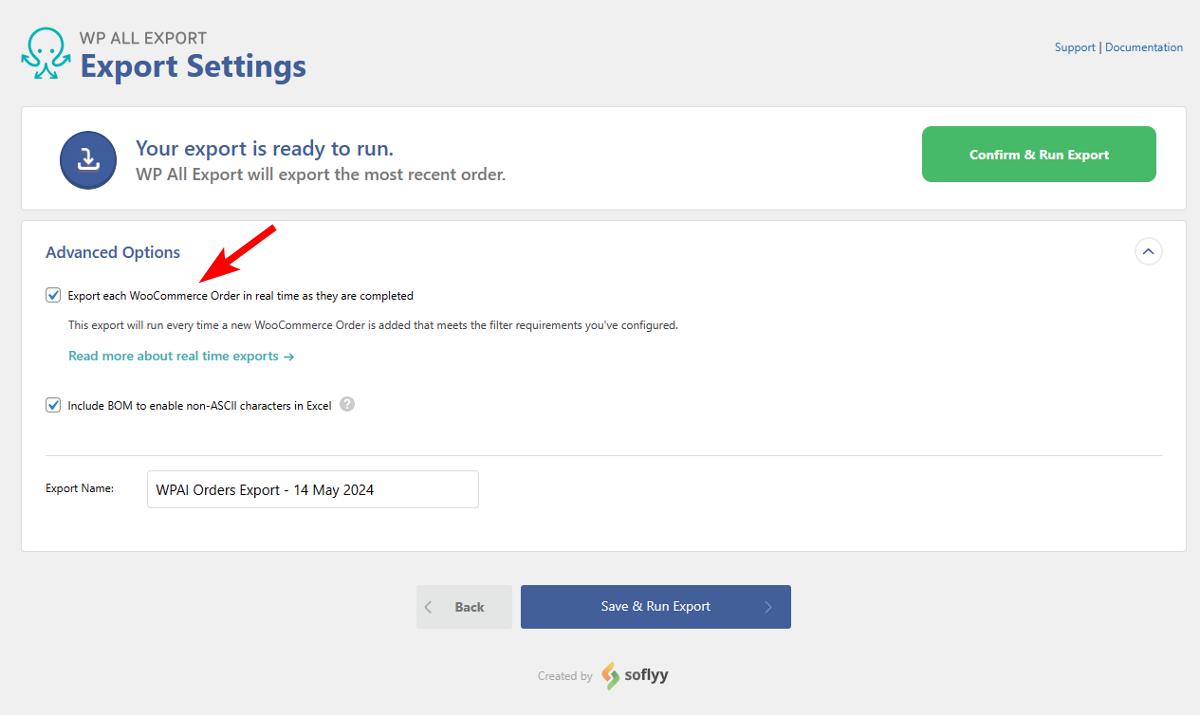
If you're starting a new export, follow the same steps up to the Export Settings screen. And, when you reach the Advanced settings section, enable the "Export each WooCommerce order in real-time as they are completed." On the same screen, make sure to change the Export name for easier identification in Zapier.
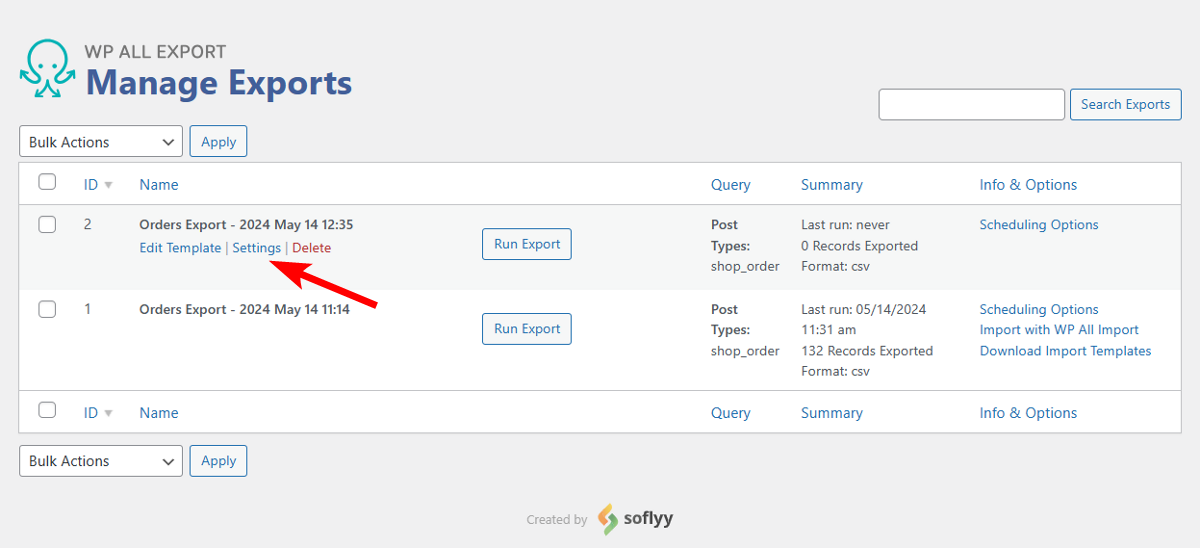
To enable it for an existing export, simply navigate to All Exports › Manage Exports and click the Settings button under one of your existing exports. On the new page under Advanced Options, enable the same real-time option.
After you're done configuring all the options, click the Save & Run Export button at the bottom. WP All Export will run the export and give you a test file that you can download to ensure the export is working correctly. Keep this file handy, as you'll need it for the next step.
It is also important to set up a status filter for this method. This is because if you don't add a filter, WP All Export will run the export every time an order status is changed. This will create duplicate entries for each order status in your Google Sheets file.
The above steps will only create a trigger every time a new order is placed. We'll also need to configure an action using Zapier so that entries are added to Google Sheets. Let's look at how to do that next.
2. Use Zapier to Connect WP All Exports to Google Sheets
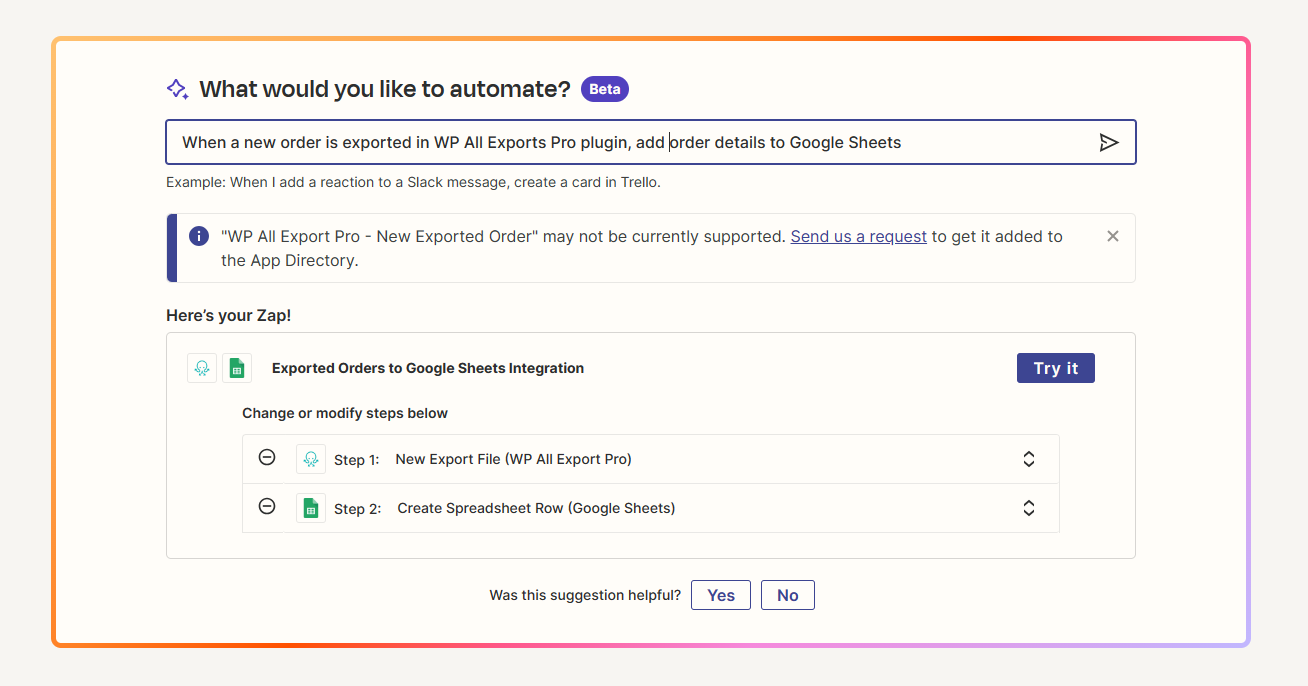
Zapier is a no-code solution that makes automation easier. To connect WP All Exports to Google Sheets, follow the steps below. You can also use the new AI Zap builder to skip the steps and have everything created for you in just a few clicks.
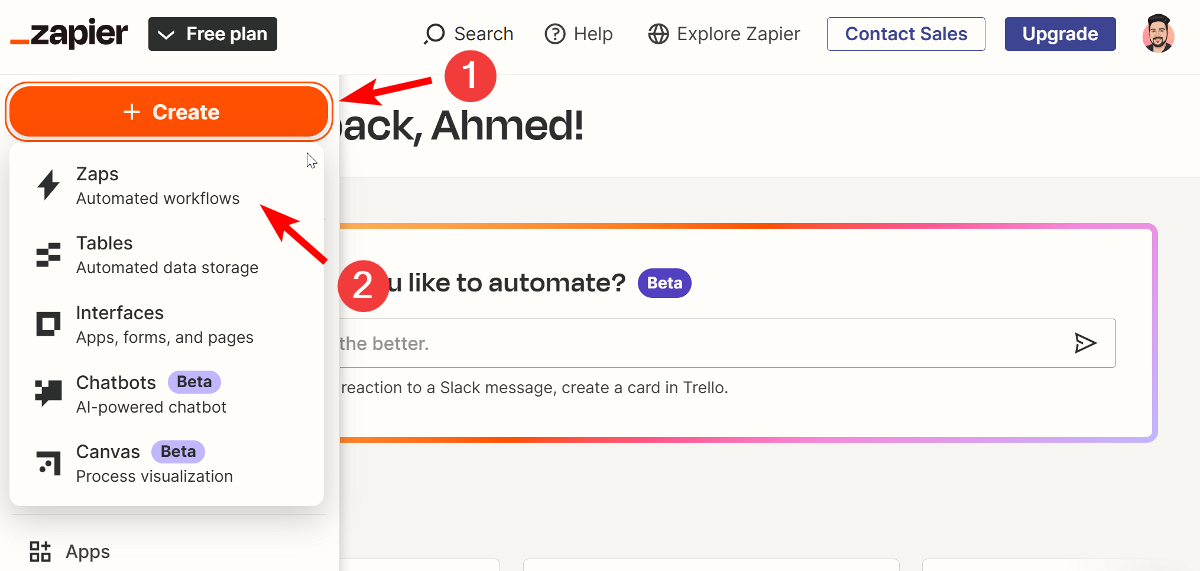
- Go to Zapier, create an account (or log in with your existing account), and click the + Create > Zap button.
- Zapier will ask you to select the trigger. Click on the Trigger option, search for WP All Export Pro, and select it from the list.

- Next, we need to choose the event. Click the event search box and select Real Time Export Completed.

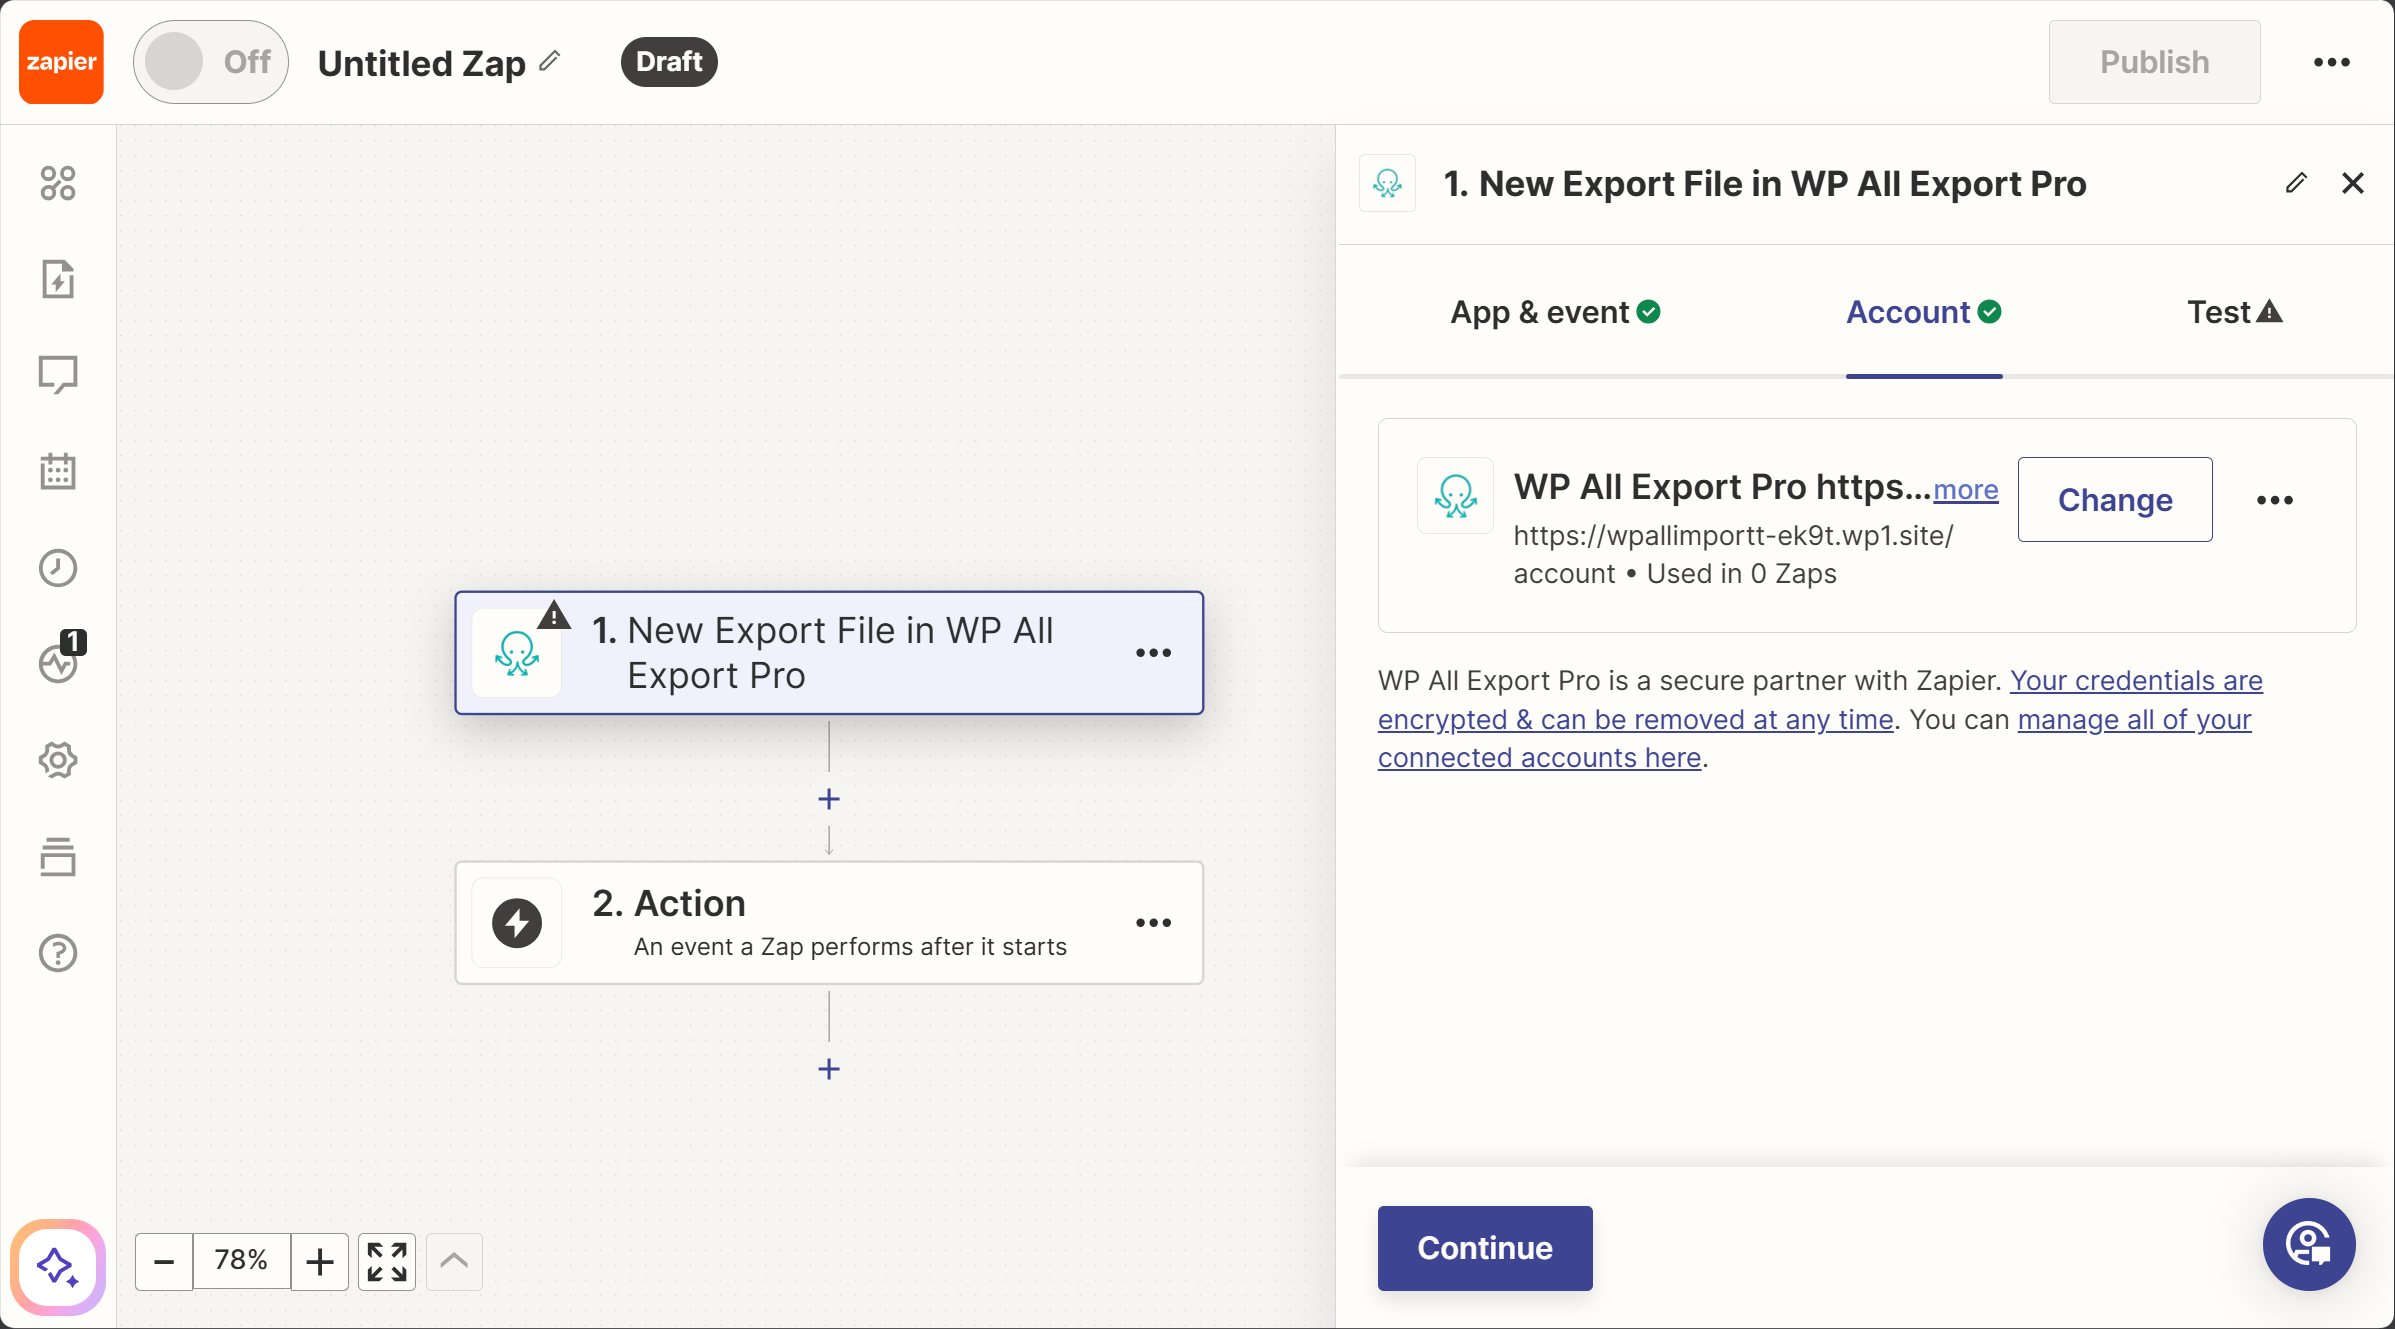
- Next, you need to connect your WP All Export account to Zapier. Click the Choose button and then + Connect a new account. This will open a window where you need to add an API key from the WP All Export settings page and enter the website URL. After you've entered both the details, click Yes, Continue to WP All Export Pro button to verify and connect the site. Click Continue to move to the next step.
- In this step, you need to select the export that'll trigger the Zap. To do that, click inside the box and choose the most recent export from the dropdown list.
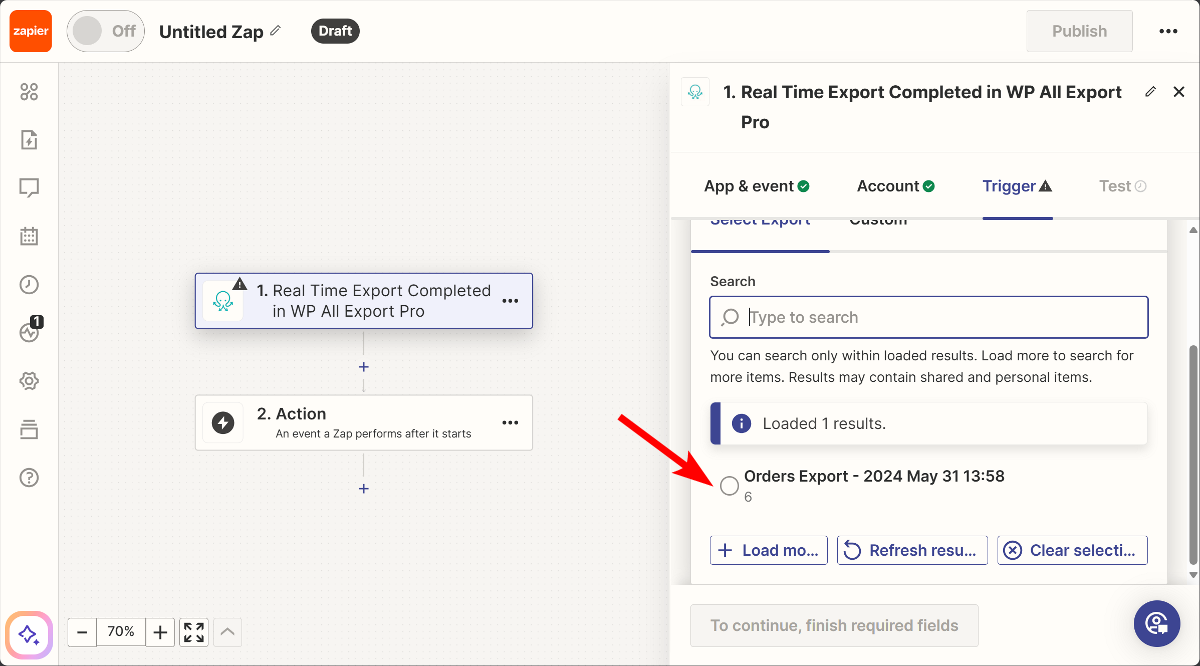
- Click Continue and test the trigger to make sure everything works as expected. If you see all green checkmarks, click the Continue button to set up your Action.

3. Create a New Google Sheet and Connect It to the Zap
In this step, we'll connect the Google Sheets to Zapier to add your order details as and when they are placed on your website.
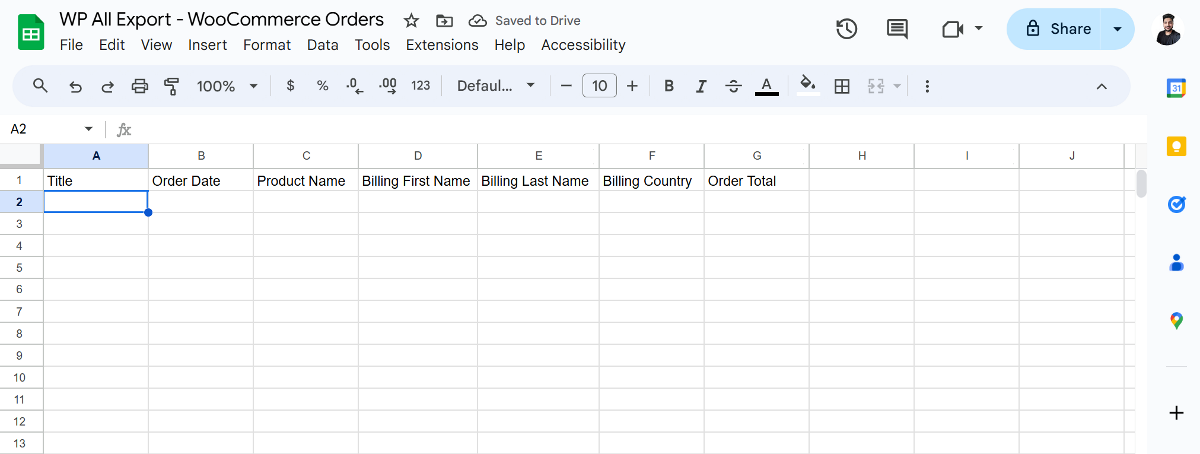
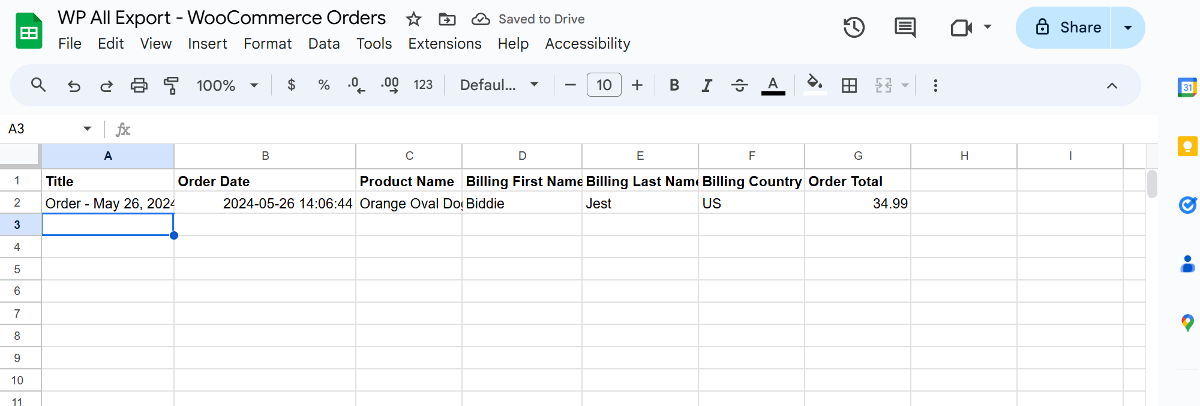
- Start by creating a new Google sheet and adding the required column names. The columns are needed for the Zapier action to work properly. You can add columns by importing the test file we downloaded previously.
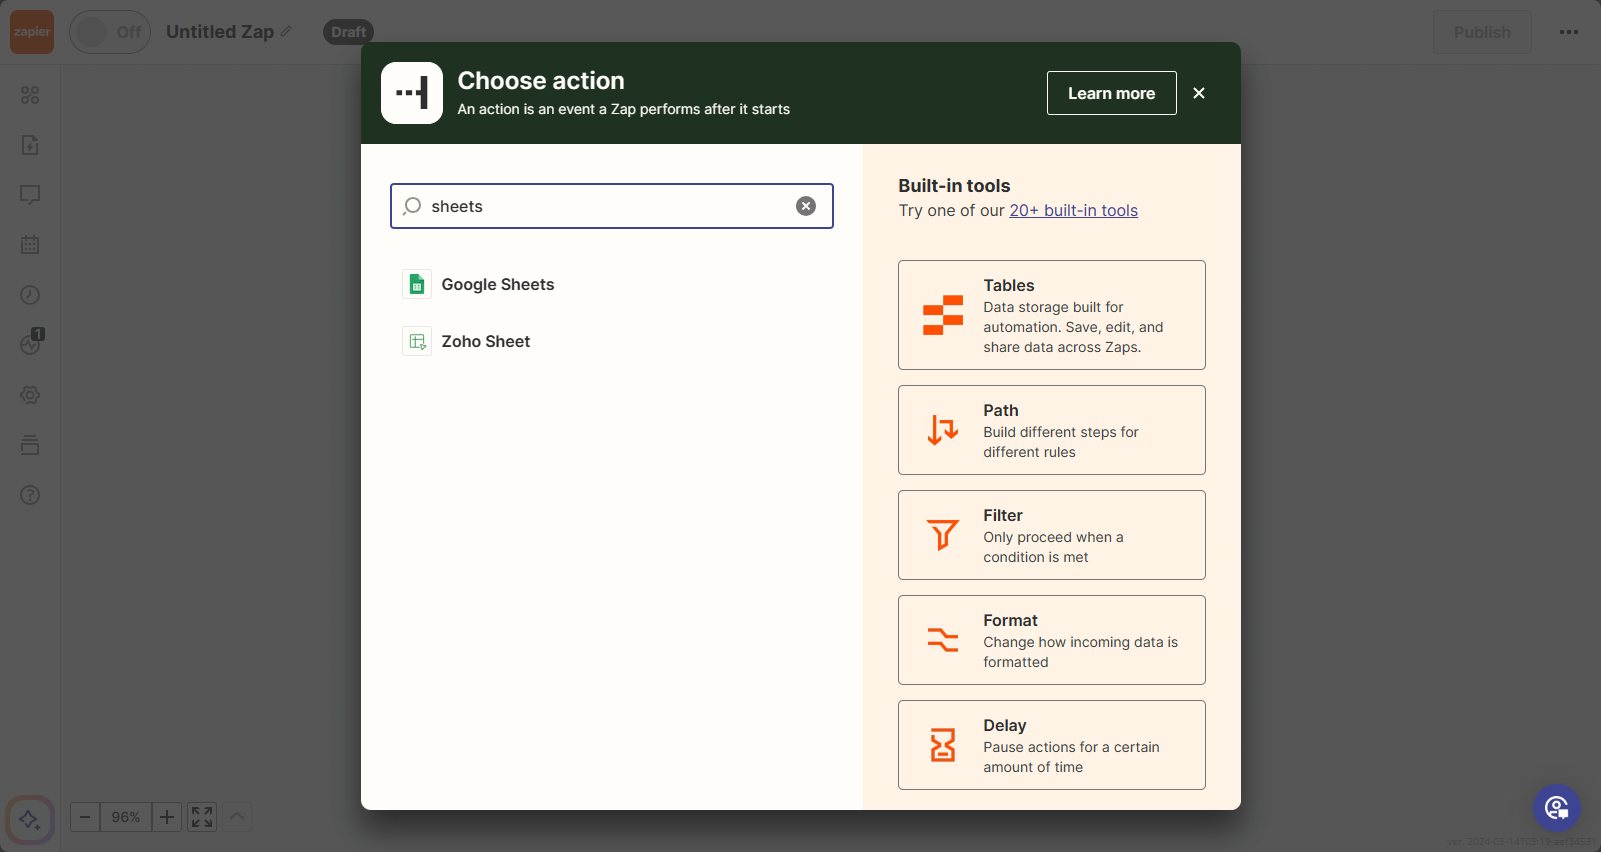
- Come back to the Zapier website and click the Action button. This will open a window where you need to search for Google Sheets in the search box and select it.
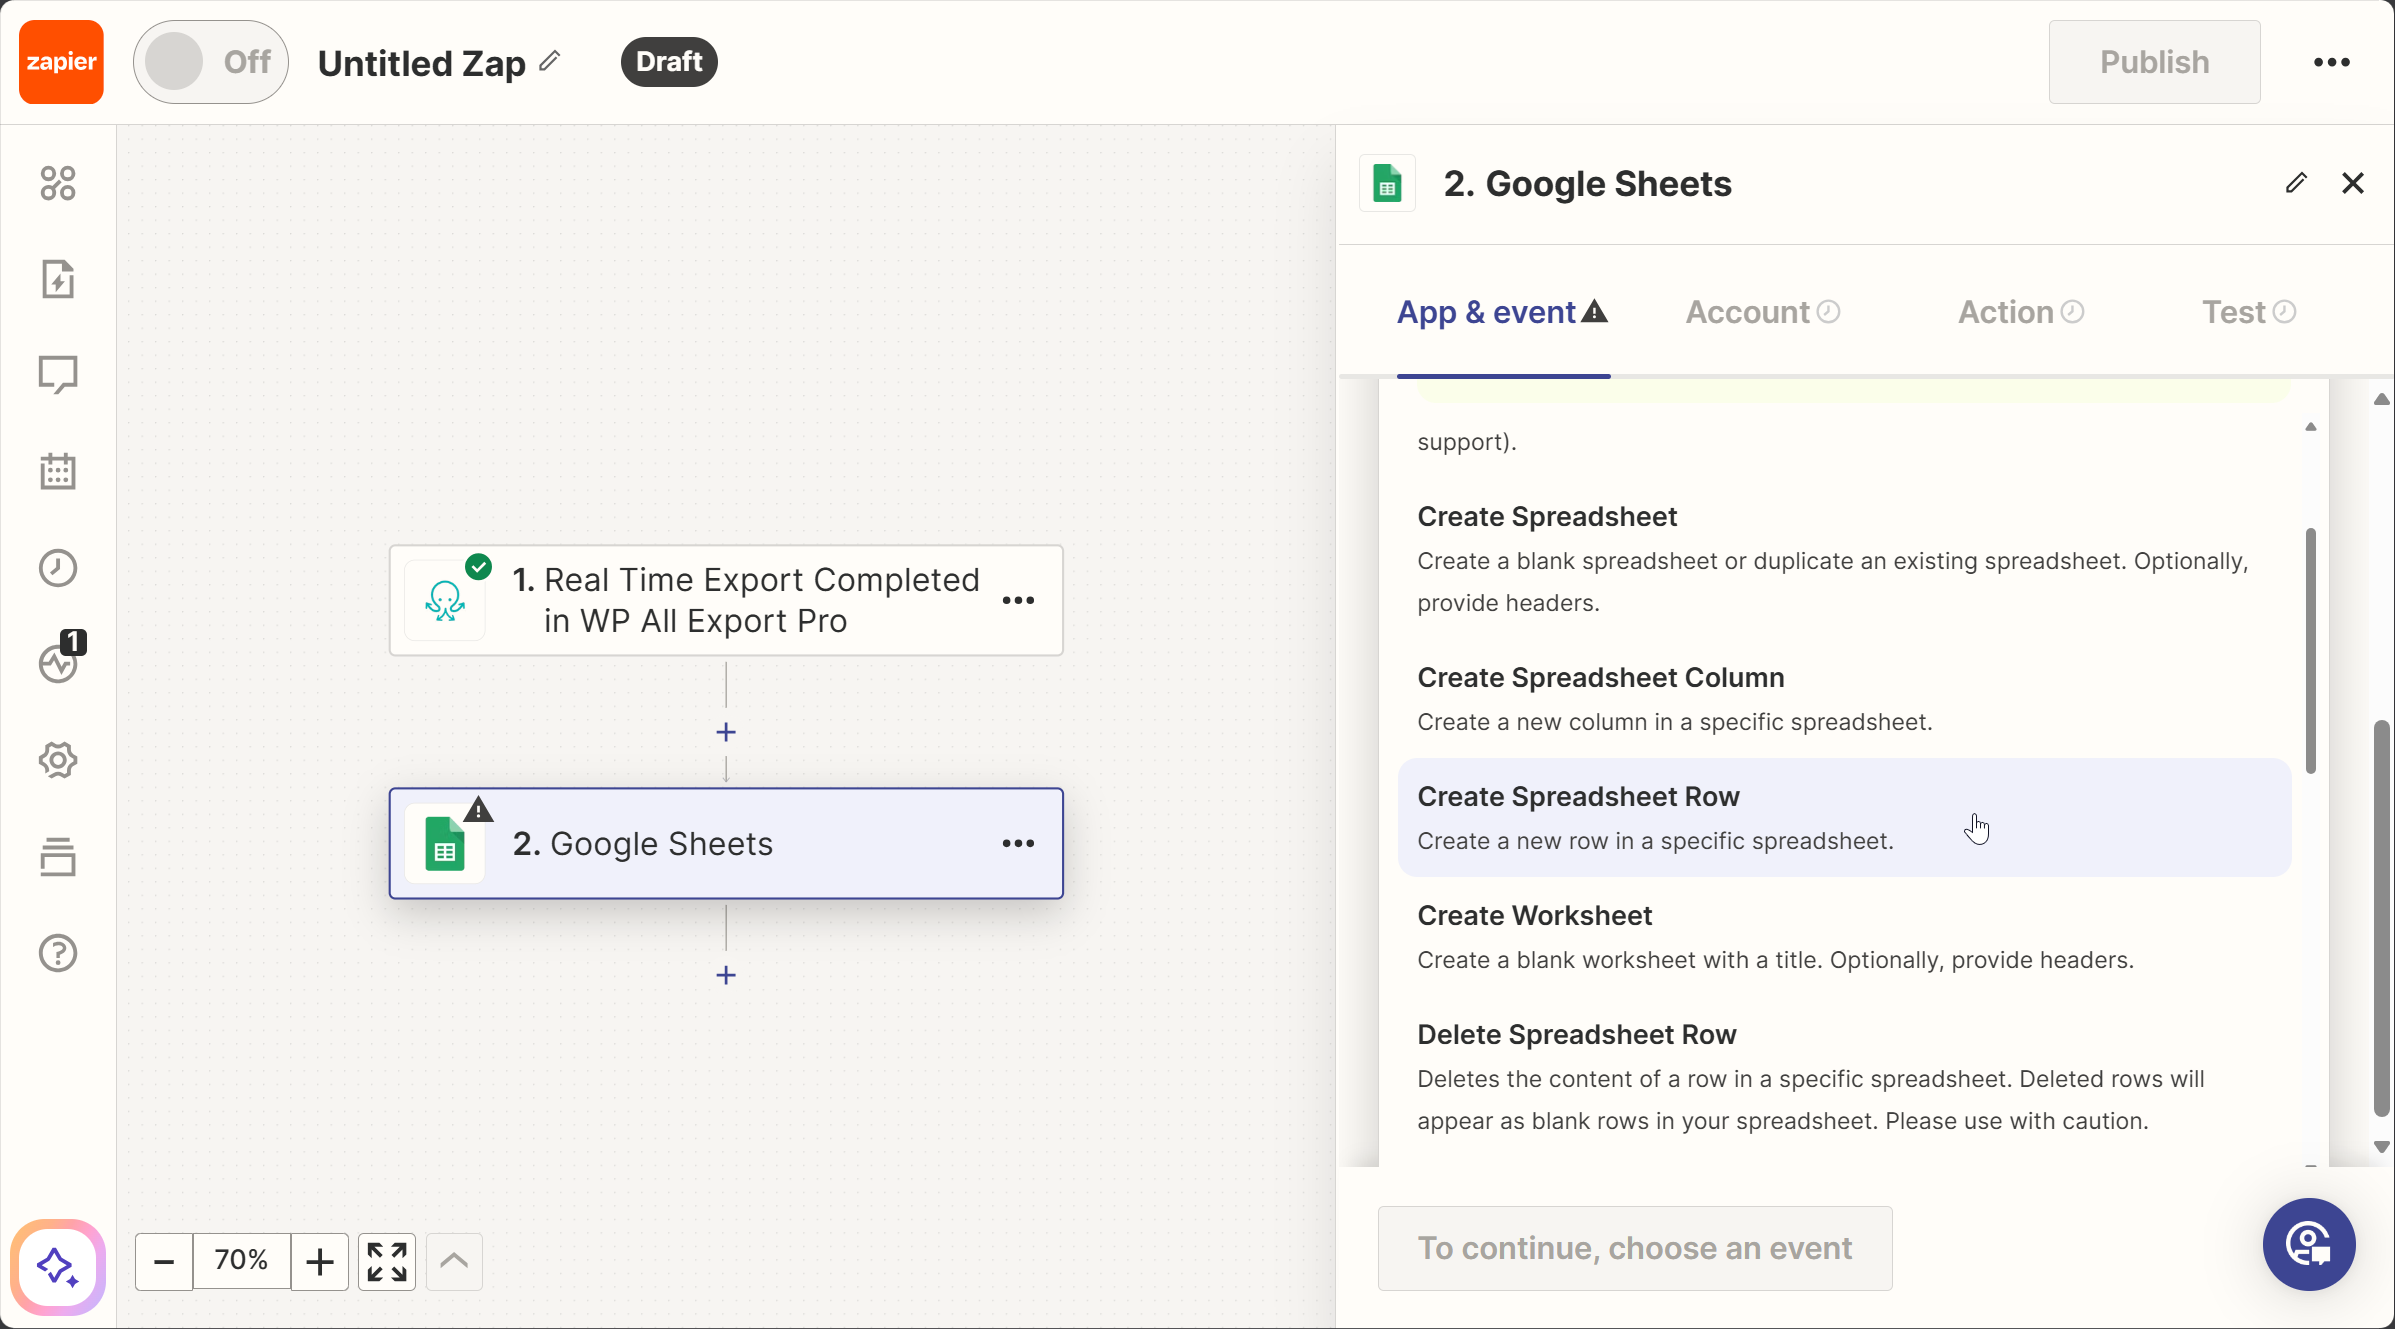
- Next, select the event as Create Spreadsheet Row and click the Continue button.
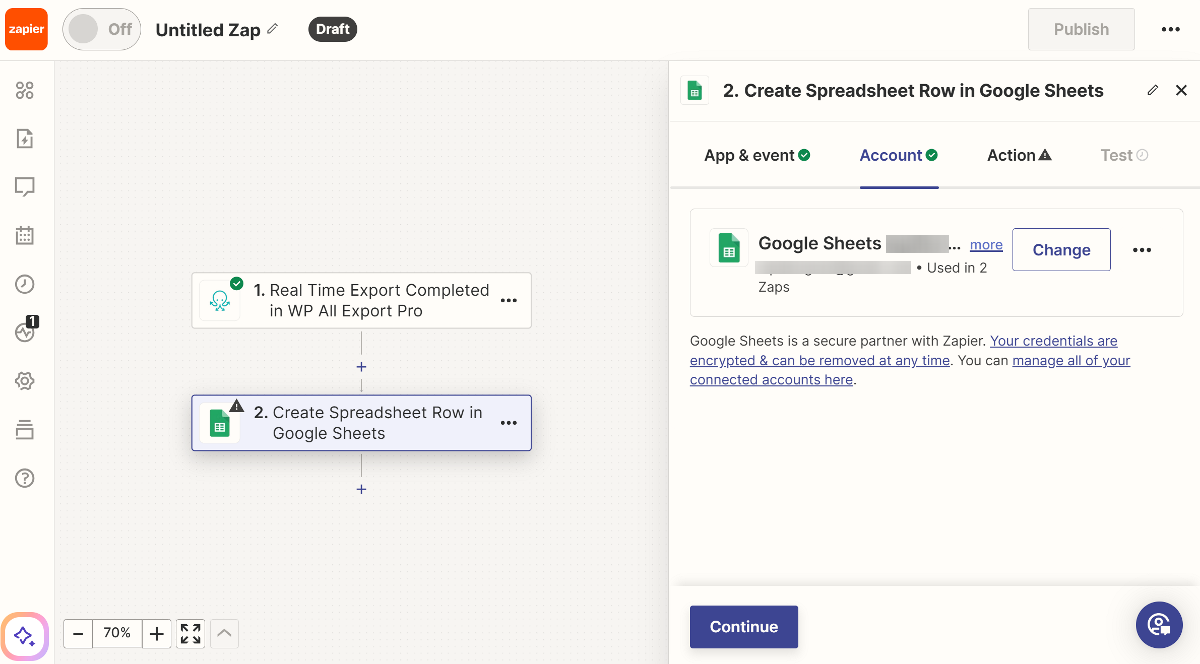
- Next, you need to connect your Google account. If you had previously connected the account, it'll automatically show there. If not, connect your account and click the Continue button.
- Here, we define where to import that data. Zapier will ask you to select Google Drive, Spreadsheet, and Worksheet to add the data.
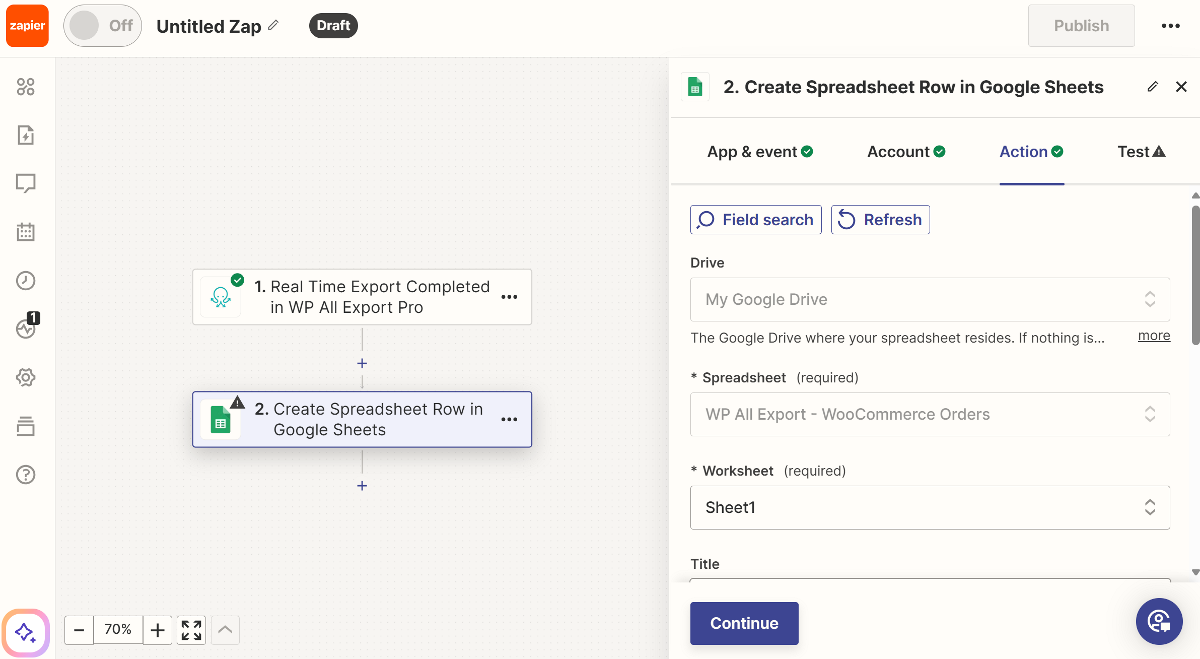
- After choosing your worksheet, Zapier will ask you to map relevant fields for each column.
4. Test Your Real-Time WooCommerce Orders Export
- Once you've selected all the fields, proceed to test your action and see if Zapier can send the recent order to your Google worksheet.
- Go to your Google Sheets and see if the new order details show up. If everything works as expected, give your Zap a name and publish it.
That's it! You've successfully created real-time exports of WooCommerce orders to Google Sheets using Zapier.
Export WooCommerce Orders to Google Sheets - Wrap-Up
Exporting WooCommerce orders to Google Sheets is a powerful way to enhance your store's data management, analysis, and reporting capabilities.
There are two primary methods to achieve this:
- Manual method: This is a straightforward method where you are required to manually upload the CSV or Excel file to Google Sheets. It is ideal for one-off or scheduled exports.
- Real-time export: This method offers a seamless solution wherein new orders are automatically added as soon as they're placed on the website. This ensures that your Google Sheets is always up-to-date with the latest order information.
The WP All Export plugin excels in both methods. You get an intuitive drag and drop interface, flexible filtering options, and robust customization features. Whether you opt for manual or real-time exporting, WP All Export makes the process efficient and user-friendly.
Ready to export your WooCommerce orders to Google Sheets? Download and install the WP All Export Plugin today!
Export WooCommerce Orders to Google Sheets - Frequently Asked Questions
Can You Export WooCommerce Orders to Excel?
Yes, you can easily export WooCommerce orders to Excel using the WP All Export plugin.
- Create a new export in All Export > New Export.
- Choose WooCommerce Orders as the export type.
- Customize the export by setting up the export columns.
- Change the Export Type to Spreadsheet > Excel File.
- Run the export and download the WooCommerce orders in Excel.
How Do I Export WooCommerce Products to Google Shopping?
Here’s how you can export WooCommerce products to Google Shopping:
- Go to All Export > New Export and select WooCommerce Products.
- Change the Export Type to Feed > Google Merchant Center Product Feed.
- Configure the export as required.
- Upload to Google.
- You can also create a custom WooCommerce product feed.
How Do I Download All Products From WooCommerce?
WP All Export supports the export of product data. Here are the steps to follow:
- Create a new export in All Export > New Export.
- Select WooCommerce Products from the available post types.
- Customize the export file.
- Complete the export and download your file.
How Do I Export and Import Data From WooCommerce?
To efficiently migrate data from one WooCommerce site to another, you can use a combination of the WP All Export and WP All Import plugins.
- Use the WP All Export plugin to export data from your source site.
- Import the exported file to your destination site using the WP All Import plugin.

