Are you looking to automatically export WooCommerce completed order emails along with other essential details?
Managing a WooCommerce store can be a demanding task, especially when it comes to handling orders and keeping your email list updated.
Exporting completed order emails manually can be a time-consuming task and prone to errors. Thankfully, there's a way to automate this process.
In this article, we'll walk you through the steps to automatically keep your email list up-to-date with the latest order information
Let's get started.
Why Do You Need To Export Completed Order Emails?
Exporting completed order emails from WooCommerce is essential for streamlining communication with your customers.
The WooCommerce order data contains valuable customer information including purchasing history and preferences.
By exporting this information along with email, you can easily send follow-up messages, promotional offers, and other important account updates. This helps increase customer engagement and build a loyal customer base.
How To Automatically Export Completed WooCommerce Order Emails to Your CRM
In this section, we'll guide you through the steps to automate the process of exporting completed order emails.
We'll be using the WP All Export plugin for this task. It is a powerful and user-friendly plugin designed to make data exports simple and efficient.

The plugin comes with robust features, including exporting full order details (even custom fields), real-time exporting, and seamless integration with email marketing and CRM tools via Zapier.
Let's start with the first step of installing and activating the WP All Export plugin.
1. Install and Activate the WP All Export Plugin
To get started, you'll need to install the premium version of WP All Export Pro along with its WooCommerce Export add-on.
After downloading the ZIP files from your account portal, navigate to Plugins > Add New, upload, and install both WP All Export and the WooCommerce Export add-on.

Once installed, make sure to activate both plugins and verify your license key. After everything is configured, we can move on to the data export steps.
2. Create a New Export for Completed Orders
In your WordPress dashboard, navigate to All Export > New Export and select WooCommerce Order as the export type.

WP All Export will scan your website and display the total number of orders available for export.
Don't worry about these numbers for now, as we'll enable real-time export in the later part of this tutorial.
WP All Export creates an export trigger every time the order status changes. To avoid creating duplicate entries in your email list, we need to set up filtering based on Order Status.
On the same page, expand the Add Filtering Options section and add the following filter rule:
- Select Element: Order Status
- Select the rule: contains
- Enter the value: Completed

After you've added all three components, click the Add Rule button to filter your orders.

Next, click Customize Export File at the bottom to proceed to the next step.
3. Add Customer Email and Other Data to Your Export File
WP All Export includes a drag-and-drop interface that allows you to select which WooCommerce order details to add to the export file.

On the right side, you'll see the Available Data section, which lists order fields organized into different tabs. These categories include:
- Order
- Customer
- Items
- Taxes & Shipping
- Fees & Discounts
- Notes
- Refunds
- Custom fields
By default, WP All Export adds a few fields. You can easily remove those by dragging them out of the selection area.
To add the completed order email to your export file, expand the Customer tab and drag and drop the Customer Account Email Address field to the selection area.

Next, add other important fields such as First Name, Last Name, Product Name, Billing Country, and more to the selection area. These fields will help you better segment your customer list for email marketing.
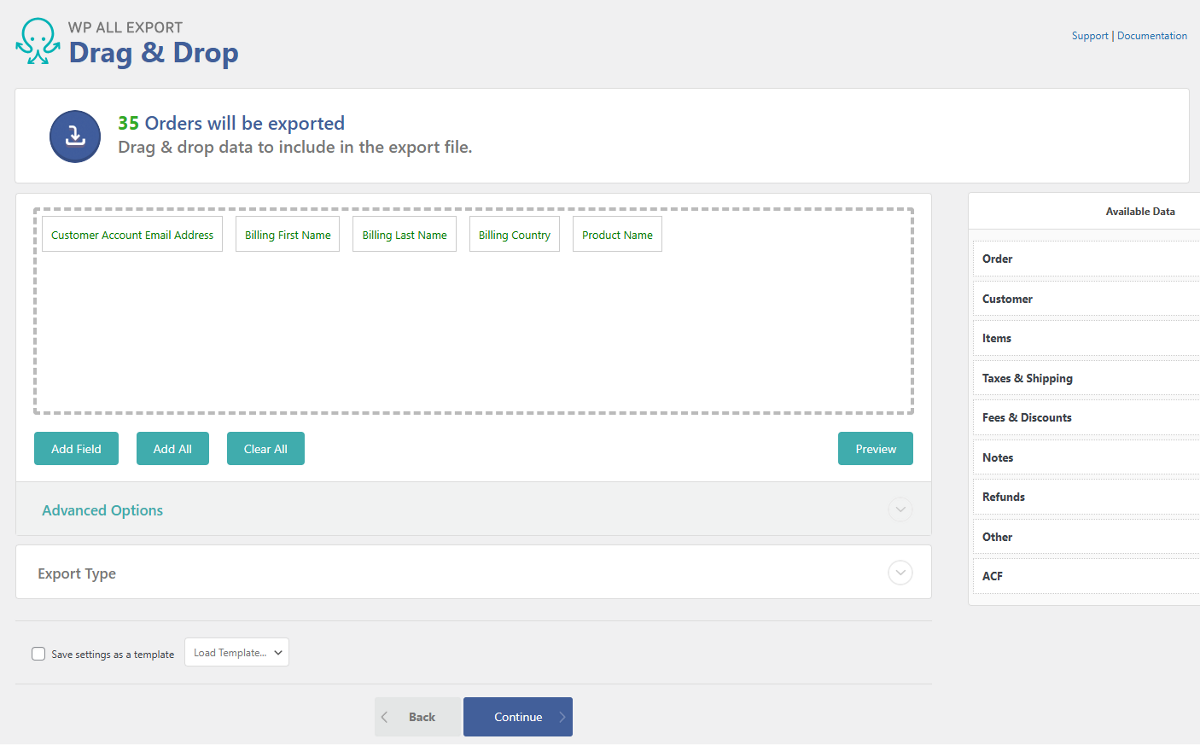
WP All Export also supports custom fields, including those created using WooCommerce extensions/add-ons. If, for some reason, you don't find a field you'd like to export, click the Add Field button and search for it.
Once you have added all the desired fields, click the Preview button to see how the order entries will look in a spreadsheet.
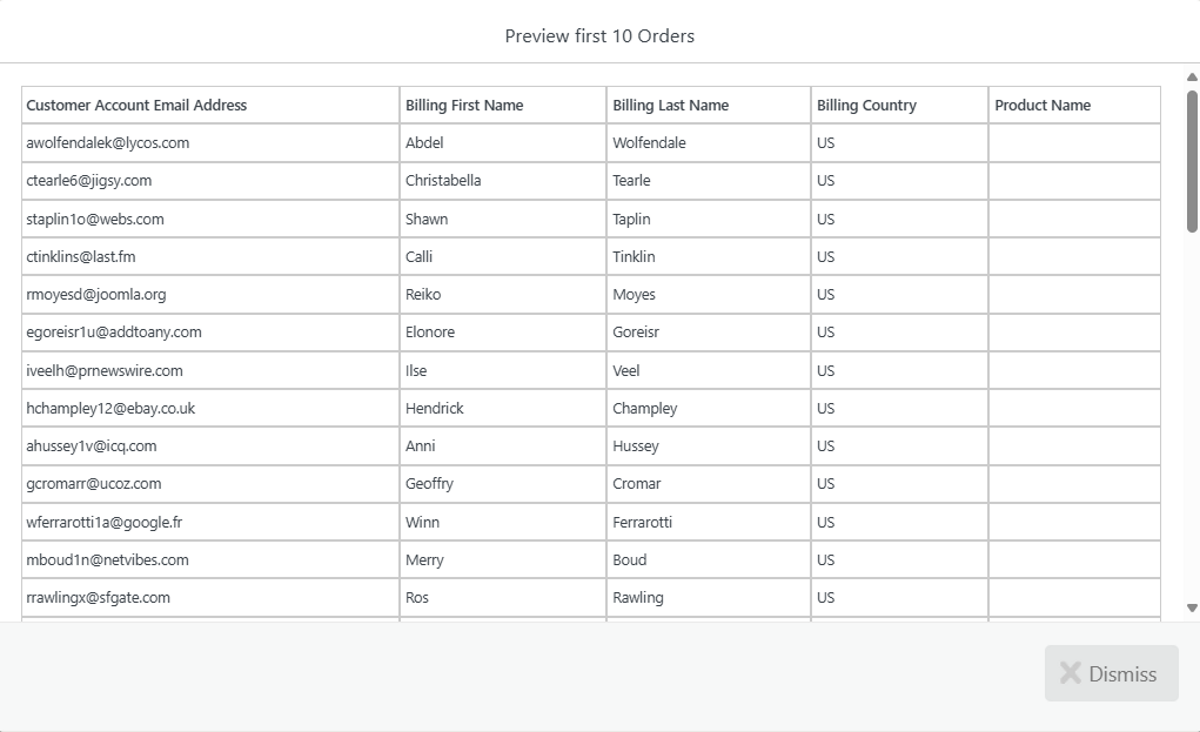
If everything looks okay, click Continue to move to the next step.
4. Enable Real-Time Export of WooCommerce Order Data
WP All Export includes several advanced options, one of which is enabling real-time export of orders. This allows you to add customer emails to your email list as soon as the order status changes to "Completed."
In the Export Settings screen, expand the Advanced Options panel and select the first option, "Export each WooCommerce Order in real-time as they are completed," to enable real-time exports. This will automatically hide all other options.
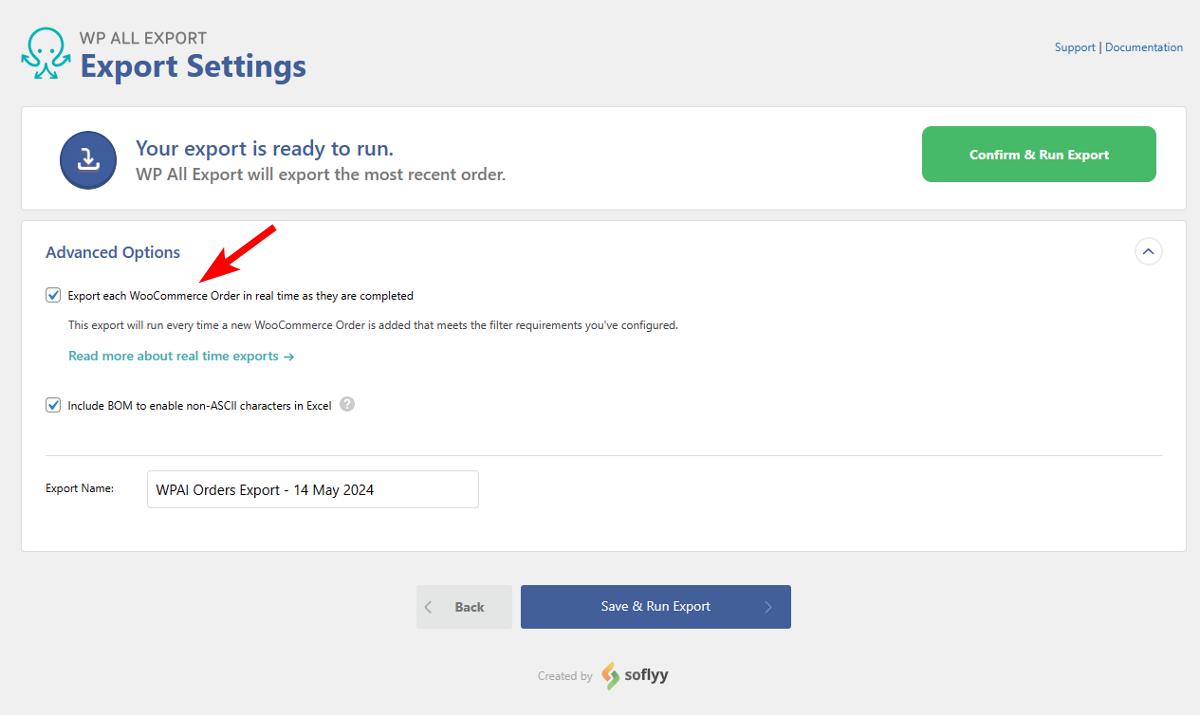
Next, add a custom file name and click the green Confirm & Run button to proceed to the next step.
WP All Export will generate a test export file. You can download and check if it contains all the needed order details.
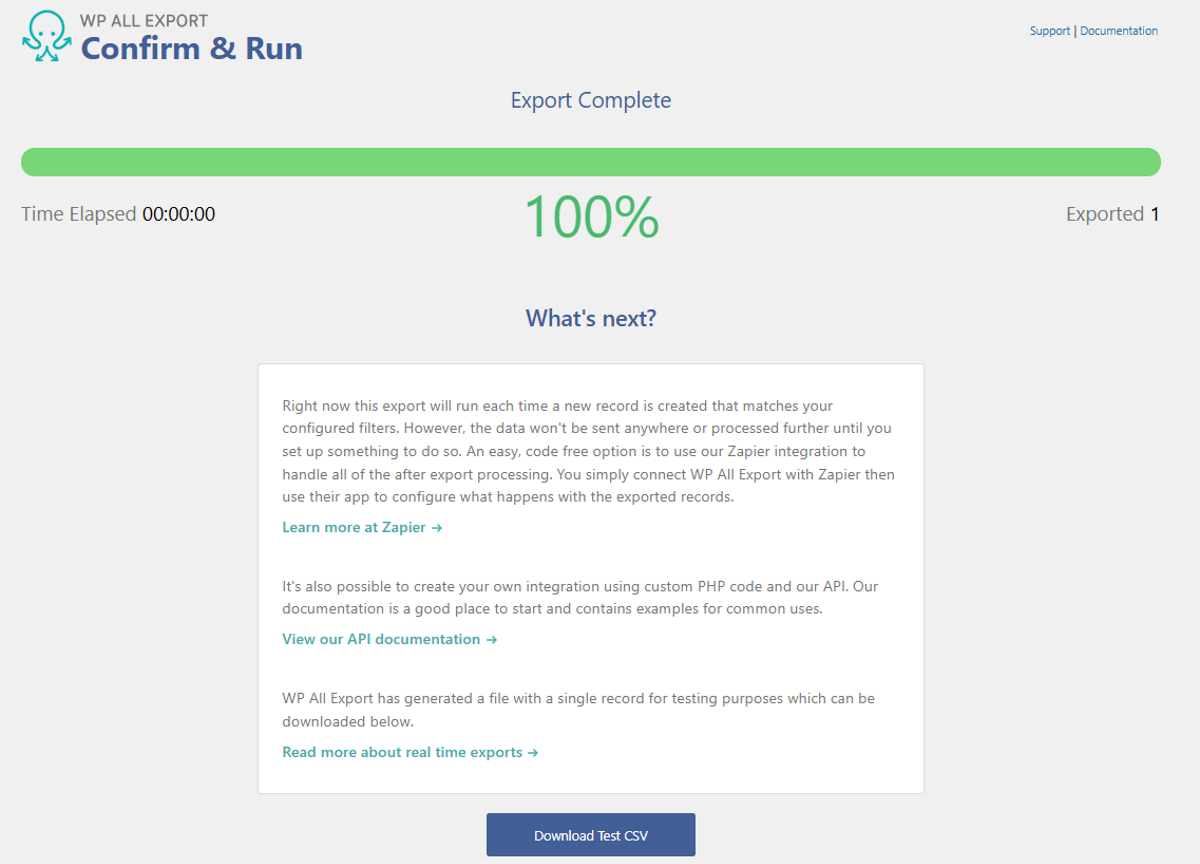
The steps we completed so far generate an export trigger. To add the completed order emails to your marketing list, you'll need to connect it via Zapier.
5. Connect WP All Export to Your CRM Using Zapier
Zapier is a no-code automation builder that allows you to connect to over 5,000 apps, including Google Sheets, email marketing, and CRM tools.
To start, go to the Zapier website and log in to your existing account. If you don't have an account, create one.
Once you're logged in, follow the steps below to create your zap and set up the action.
Create a Zap and Select your Trigger Event
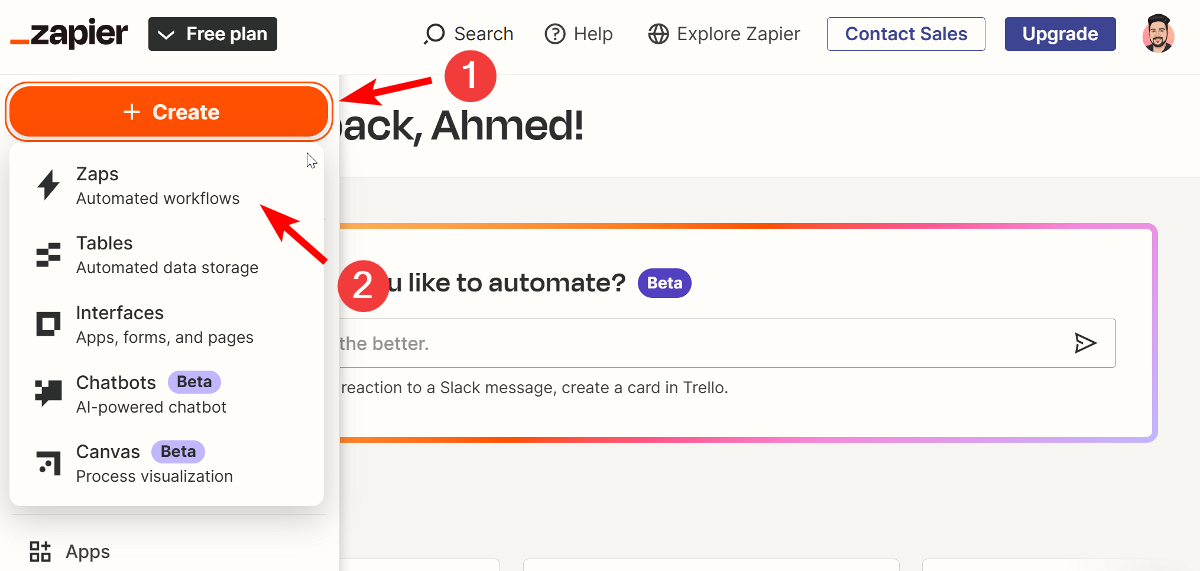
Click the + Create button and then select Zap from the dropdown.
Zapier will ask you to select a trigger for the automation. In the search box, type "WP All Export Pro" and select it from the results.

The automation builder will open. In the side panel, click the Event search box and select Real-Time Export Completed. Once done, click Continue to move to the next step.

Zapier will ask you to connect your WP All Export account. To do this, click the Choose button and then + Connect a new account. A new window will open where you need to enter the API key from the WP All Export settings page and the website URL.

After you've entered both details, click Yes, Continue to WP All Export Pro to verify and connect the site. Once done, click Continue to move to the next step.
In this step, Zapier will ask you to select the trigger we created in WP All Export. Click inside the search box and select the recent real-time exports from the list. Next, click Continue to test your trigger. If everything works as expected, you'll see a green checkmark in the Test tab. Click the Continue button to move to the next step.

Add Filter to Your WooCommerce Order Data
We want to segment our customers based on the data in the exported file. Zapier allows you to set up a filter between the trigger and action so that customers are added to the right groups.
To set up your filter, click the plus (+) icon and select the Filter by Zapier option in the list.

In the side panel that opens, click the Continue button. Similar to the filter we applied in WP All Export, select the field and condition from the list and then enter the value. You can also add multiple filter rules, but we'll stick with one.

Click the Continue button to test your filter and then click Continue again to move to the Action button.
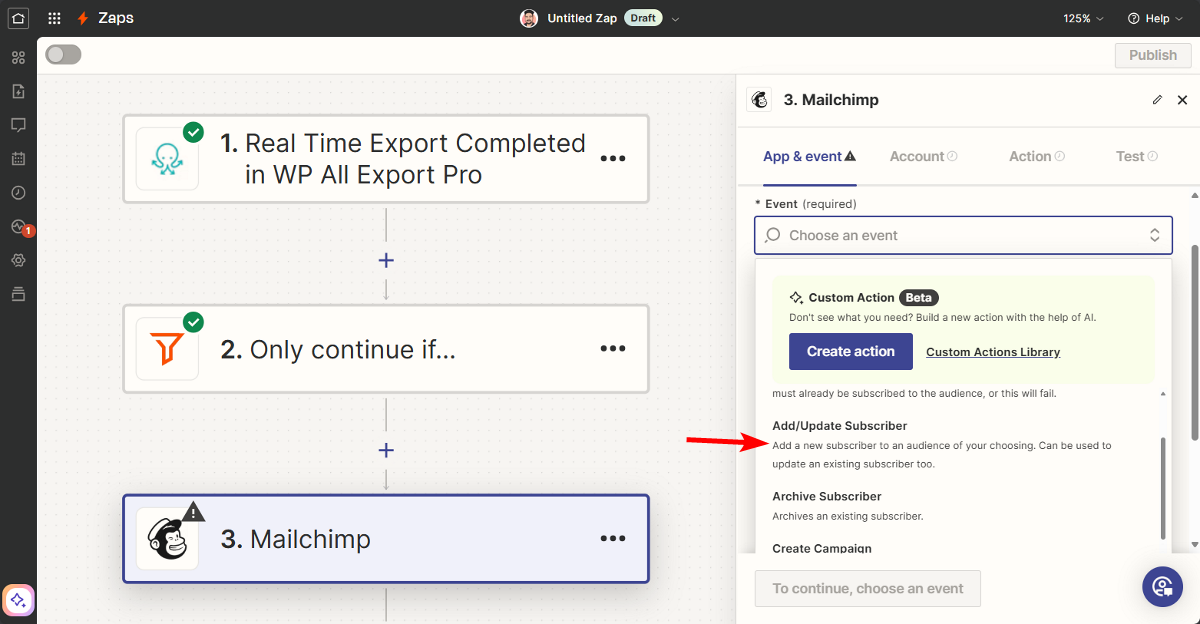
Set Up Your Action in Zapier
The Action button lets you set up what will happen when a new real-time export is triggered in WP All Export. Click the Action button and search for your email marketing or CRM tool. For this tutorial, we will select Mailchimp and show you the steps for it. No matter what tool you select, the steps will be similar.

Next, we need to select the event that will occur when a new export is triggered. In the event list, select "Add/Update Subscriber" and click the Continue button.
Zapier will ask you to connect your Mailchimp account. If you previously connected your account, you don't need to do anything here — just click the Continue button.

To connect a new account, click the Sign In button and enter your account credentials. After you log in, you'll be taken back to the Zapier website where you need to click the Continue button.
Select your Mailchimp audience and then click the Subscriber Email box. In the list of data fields from WP All Export, select Customer Account Email Address. Scroll down and select the right audience based on the filter you applied in the previous step.
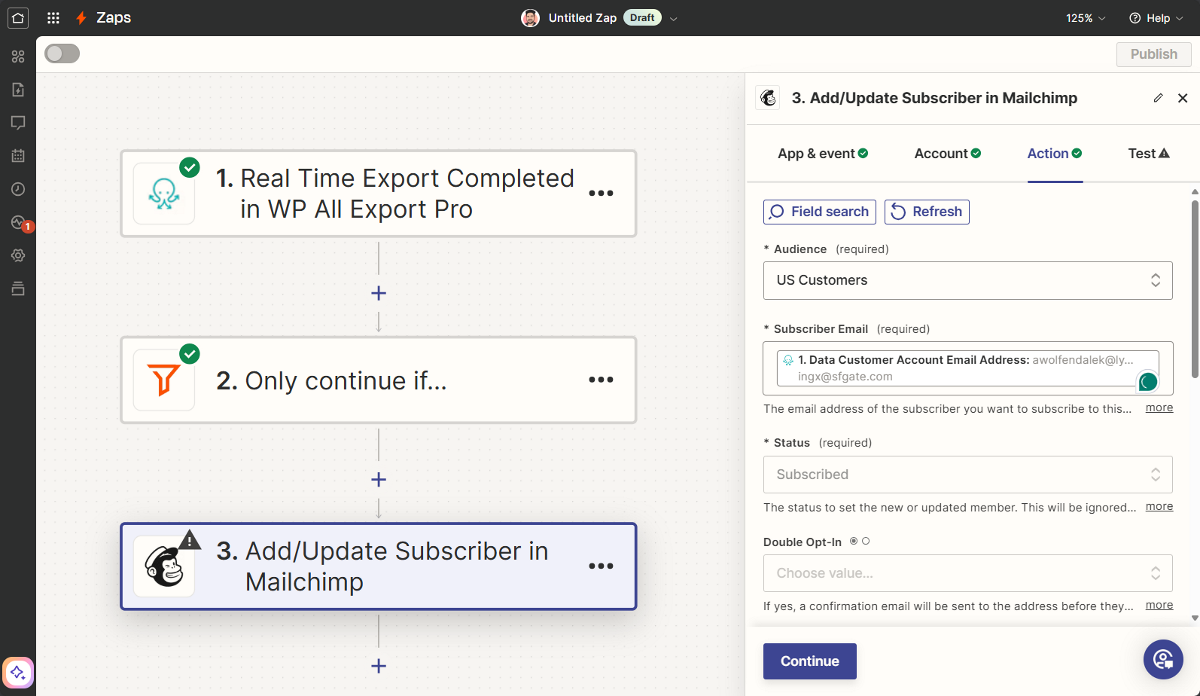
Note: You need to have the audience, groups, and tags pre-created in your choice of marketing tool.
Similarly, choose the tags you want to apply and then map the Billing First Name field to the First Name box.

Click Continue > Test Step to test your action. Once done, enter the Zap name and publish it.

That's it! You can create similar Zaps to add customer emails to different segments in your email list.
6. Test Your Real-Time WooCommerce Order Email Export
To make sure everything is working correctly, place a test order on your website and mark it as complete.
This should automatically add the customer email to your email list. Check the group and tags to make sure they are added correctly.
That's it! You've successfully set up real-time exports of WooCommerce order emails using Zapier.
Automatically Export WooCommerce Order Emails - Wrap-Up
Automating the export of completed WooCommerce order emails to your CRM helps you send timely and personalized emails to your customers.
WP All Exports is the best WooCommerce export plugin that automates this task for you. It integrates with Zapier and allows you to pass order emails to the marketing tool of your choice.
Along with email, it also lets you export other order data that can help segment your customer list and send personalized emails. Ready to get started? Download and install the WP All Export plugin today to simplify your WooCommerce order email exports and boost your marketing efforts.
WooCommerce Export Order Emails - Frequently Asked Questions
How Do I Export Emails From WooCommerce?
Exporting emails from WooCommerce is simple with the WP All Export plugin. Follow these steps:
- Start a new export by navigating to All Export > New Export.
- Use the drag-and-drop interface to add customer email and any other desired fields to your export file.
- Run the export and download the CSV file containing customer emails and other data.
Can I Export Orders From WooCommerce?
Yes, you can easily export orders from WooCommerce using the WP All Export plugin. Just follow these steps:
- Create a new export in All Export > New Export and choose WooCommerce Orders as the export type.
- Customize the export file by adding fields from the Available Data section on the right.
- Run the export and download the file containing your WooCommerce orders.
What Is the Best Order Export Plugin for WooCommerce?
WP All Export is the best plugin for exporting WooCommerce orders. It allows you to export your order data in various formats such as CSV, Excel, and XML. Key features include a drag-and-drop interface for adding export fields, powerful filtering options, automatic scheduling, and real-time order exports.
How Do I Export Customer Information From WooCommerce?
To export customer information from WooCommerce, follow these steps:
- Go to All Export > New Export.
- Select to export WooCommerce Customers. Do not set any filters.
- Use drag and drop interface to add the export fields.
- Configure and run the export.
- Download the exported Woocommerce customers.

